PXS Remote Control

To send remote control commands to a PXS, it must be running an application that supports remote control commands.

On a PXS that is running an application that supports remote control commands, the remote control can be enabled or disabled using the control command.

Advanced Relay provides two remote control applications:

To establish communication with a PXS that has remote control enabled, you will need its host name and IP address.

wxpxscontrol

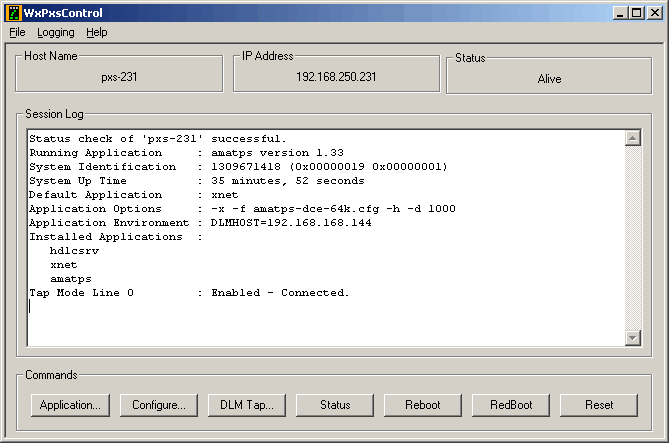
When wxpxscontrol is executed, a window will be displayed that looks like this:

WxPxsControl Main Screen
WxPxsControl Application

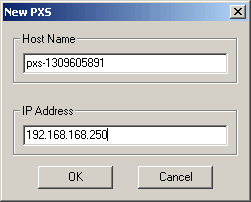
The host name and IP address of the PXS can be entered by clicking on File/New PXS... You will be prompted with a dialog box that allows you to enter the host name and the IP address:

WxPxsControl New PXS Dialog

The host name and IP address can also be input with a text file that has the host name and IP address in it in the following format:

<host name>=<IP address>

These files can have any number of PXS host names and addresses.

Click on File then Select PXS... . You will be prompted with a select file dialog box. Chose a text file that has the host name and IP address in it in the format mentioned above and click OK. A PXS list dialog box that shows the PXS host names will be displayed that looks similar to this:
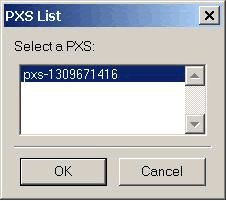
WxPxsControl Select PXS Dialog

Select the PXS you want and click OK.

The host name and IP address can also be entered on the command line when the program is started. The -h options must proceed the host name and the -a option must proceed the IP address:

C:\> wxpxscontrol -n pxs-1309671416 -a 192.168.168.246

If the PXS is running an application that supports remote control, when the wxpxscontrol application is executed, the log window in the application will look similar to the following:

Status check of 'pxs-1309671416' successful.
Get application data completed: 0 (22 bytes).
Get application list completed: 0 (17 bytes).
Default Application     : ecostest
Application Options     : -a -t paris
Application Environment :
Installed Applications  :
   default
   ecostest
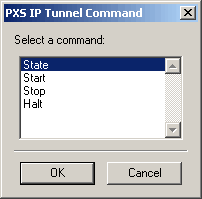
The Application... button is used to send application specific commands to the PXS. When the Application button is pressed, you will be prompted with a list dialog box with the supported commands. Select the command to send and click OK.

Sample Application Dialog Box

The Configure button displays a dialog box that shows the applications in the PXS's flash memory, the application options and the application environment variables. These can be changed and saved to the PXS's configuration by clicking OK.

The DLM Tap... button displays a dialog box to enable or disable the PXS DLM tap for live data capture.

The Status button checks to see if the application on the PXS is running.

The Reboot button resets the PXS and immediately loads and runs the default application.

The RedBoot button resets the PXS and disables the loading of the default application.

The Reset button resets the PXS, and if the timeout is not 0, then after the timeout expires, the default application is loaded and run.

Successful remote control operation information will be displayed in the log window.

If an error occurs while trying to communicate with the PXS, an error message will be displayed in the log window and an error dialog box will be displayed that looks similar this:

Error Dialog Box
Error Dialog Box

pxscontrol

pxscontrol is a command-line interface to remotely control a PXS. It has the same functionality as the GUI version of the program. In addition pxscontrol has an option to set a program license in the box.

Syntax

pxscontrol

Optional command line parameters are as follows:

[-A <argument list>]

  Argument list for a command.  For more than one argument, the argument
  list should be enclosed in quotes.
  Default: <none>

[-a <PXS IP address>]

  IP address of the PXS.
  Default: 192.168.250.250

[-c <application command>]

  Command from the command set to issue to the running application.
  Default: <none>

[-l <serial:application:sequence:features:license>]

  Update license information in the PXS.  License data in the given
  format will be supplied by Advanced Relay.
  Default: <none>

[-n <PXS host name>]

  Host name of the PXS.
  Default: pxs-1309671422

[-r <reset type>]

  Issues a hardware reset of the given type.  The reset types are
  Normal, Reboot and Redboot.
  Default: <none>

[-s] print command set

  Print the command set supported by the running application.
  Default: Don't print.

[-T <tap line>]

  Line to apply the -t tap command to.
  Default: 0

[-t <tap code>]

  DLM tap command:  State=0, Enable=1, Disable=2
  Default: <none>

Examples

The following command will stop the application running in a PXS named aftx25-1 at ip address 10.1.1.2:

C:\> pxscontrol -a 10.1.1.2 -n aftx25-1 -c stop
Running application is 'aftx25 version 1.17'
Stop command successful.

The following command will reset a PXS named x25gateway at ip address 192.168.250.250. After booting, the PXS will remain at the Redboot prompt.

C:\> pxscontrol -a 192.168.250.250 -n x25gateway -r redboot
Running application is 'aftx25 version 1.17'
Reset of 'iproute' started.

The following command will set the software license of a PXS named iptunnel-AA at ip address 192.168.250.250 with serial number 1309671423. (See PXS Software Licensing)

C:\> pxscontrol -a 192.168.250.250 -n iptunnel-AA -l 1309671423:iptunnel:0x00000000:0x00000000:4FDF936A-8C40692C
License of 'iptunnel-AA' updated.